How to secure your Claris FileMaker Server in 7 simple steps
Claris FileMaker Server is a powerful and flexible tool, but its default configuration leaves several security gaps that administrators often overlook. If you’re deploying FileMaker Server in a production environment, it’s critical to harden your installation, especially all publicly accessible components such as the Administration Console and the WebDirect component.
In this article, I’ll walk through practical steps to secure your FileMaker Server, from enforcing password policy to encrypting your databases. Each section includes explanations, best practices, and references to official Claris documentation.
Note that some of the points discussed refer specifically to the default configuration of FileMaker Server on Windows environments.
The same general principles can be applied to all Claris supported platforms, which are not covered in detail in this blog post.
Avoid default credentials
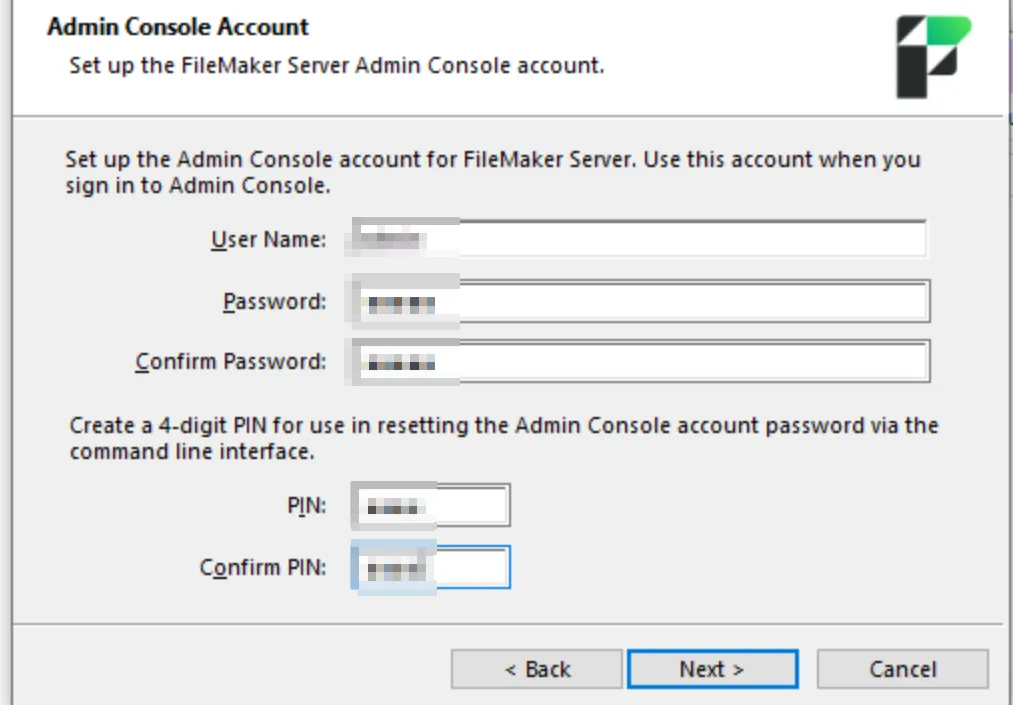
One common oversight during the FileMaker Server installation process is the use of the default administrator username. By default, the setup screen automatically pre-fills the username field with the default value admin.
Although this isn’t a fixed or mandatory account, many administrators leave it unchanged, making it a predictable and therefore weak choice that attackers can easily target.
It is strongly recommended to replace the suggested default username with a custom and unique administrator name, and to set a strong password and PIN during the setup phase.
In fact, because FileMaker Server doesn’t enforce any password strength requirements, it’s up to you to ensure your credentials are robust enough. Here are a few basic guidelines to help you choose a strong password:
- Use at least 12 characters
- Combine uppercase, lowercase, numbers, and symbols
- Avoid dictionary words, predictable patterns, or parts of the username
The PIN you set is equally important. It is not just a convenience feature, but a key element used to reset the administrator password for the Admin Console. If an attacker gains access to the PIN, they could potentially take control of your FileMaker Server.
For this reason, avoid simple numeric patterns such as 123456 or 000000, and do not reuse the same PIN across multiple servers.
Further information can be found here: https://cheatsheetseries.owasp.org/cheatsheets/Authentication_Cheat_Sheet.html
By choosing a strong password and a secure, unique PIN, you establish a solid first line of defense against unauthorized access and help ensure the long-term security of your FileMaker environment.
Restrict Access to the Admin Console
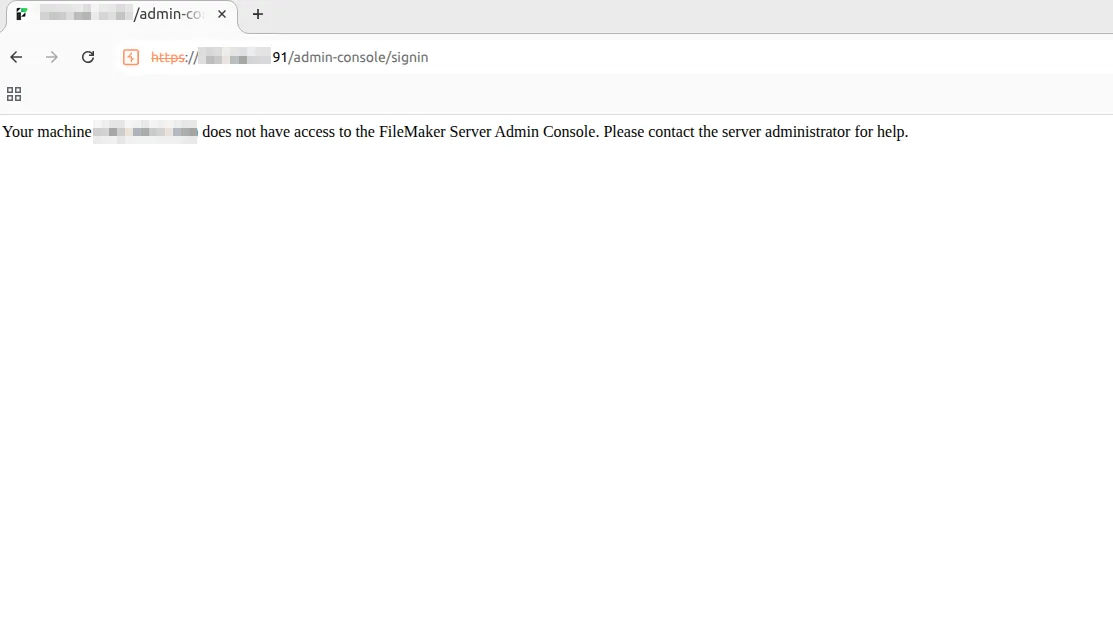
Although there is no official procedure to implement MFA (Multi-Factor Authentication) for accessing the Admin Console, there are several ways to mitigate this limitation, such as restricting access to specific trusted hosts.
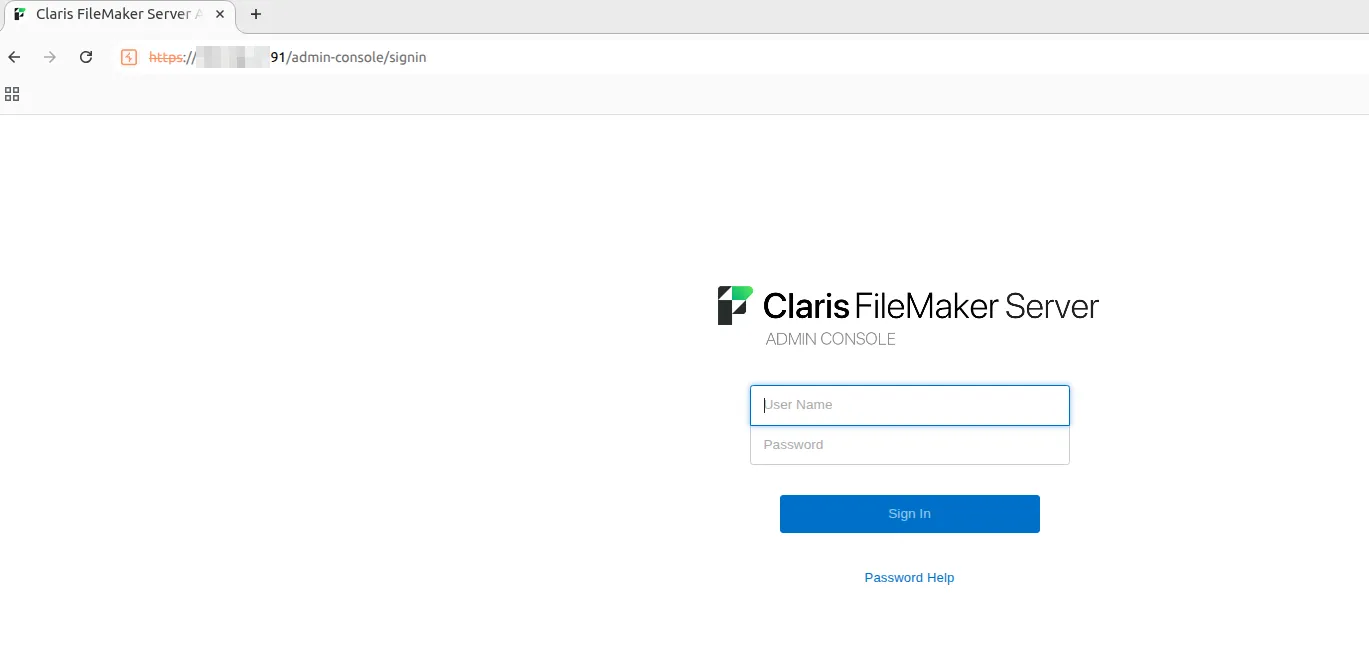
After installation, the Admin Console is publicly accessible by default on port 443 (https://[server_address]:443/admin-console).
Even if this configuration doesn’t represent a direct vulnerability, it still exposes a potential entry point for attackers targeting the Admin Console. The lack of built-in multi-factor authentication (MFA) support, combined with the use of weak or default credentials, further increases the risk of unauthorized access.
To reduce exposure, you can restrict access to the Admin Console by navigating to:
Administration → Restrict Access → Enable and entering only permitted IP addresses (note that localhost is always permitted).

This limits access to specific IP addresses, helping mitigate the risk of unauthorized connections.
Reference:
https://help.claris.com/en/server-help/content/restrict-access.html
Restrict access to databases view
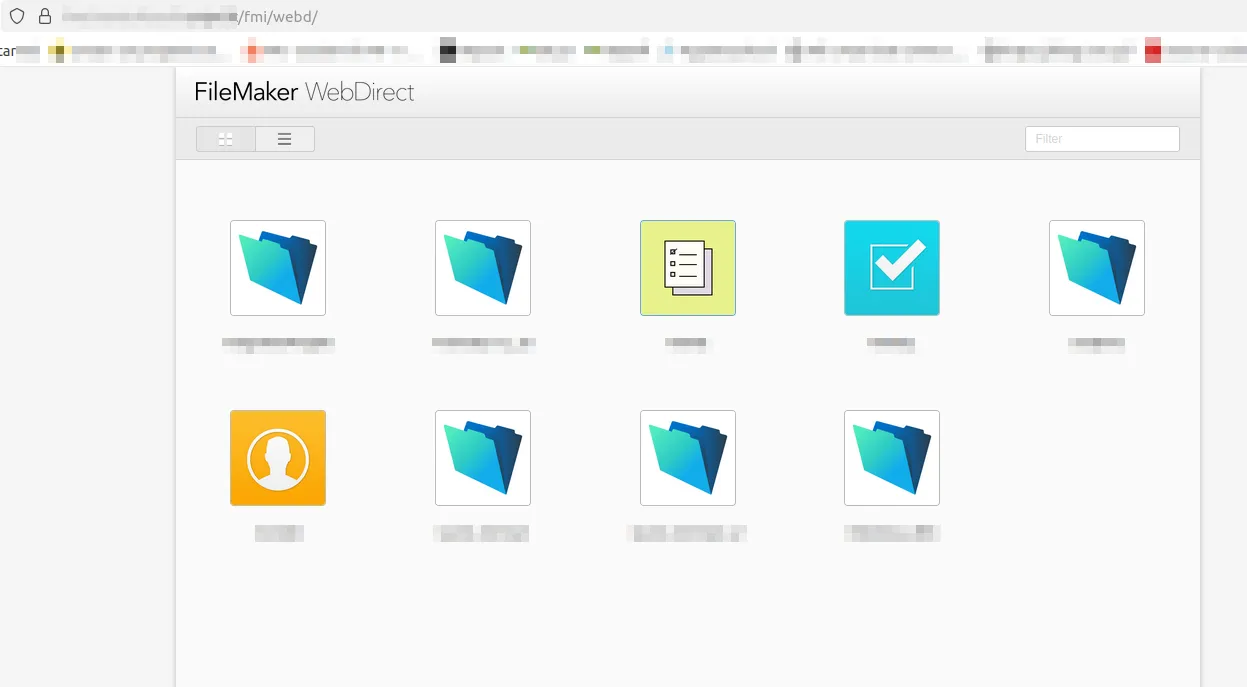
FileMaker’s WebDirect interface automatically lists all available databases under the /fmi/webd/ endpoint.
This can unintentionally expose database names, which can be valuable reconnaissance information for attackers.
In order to fix this, open the Admin Console and enable the flag: Configuration -> FileMaker Clients -> Enable Filter Databases
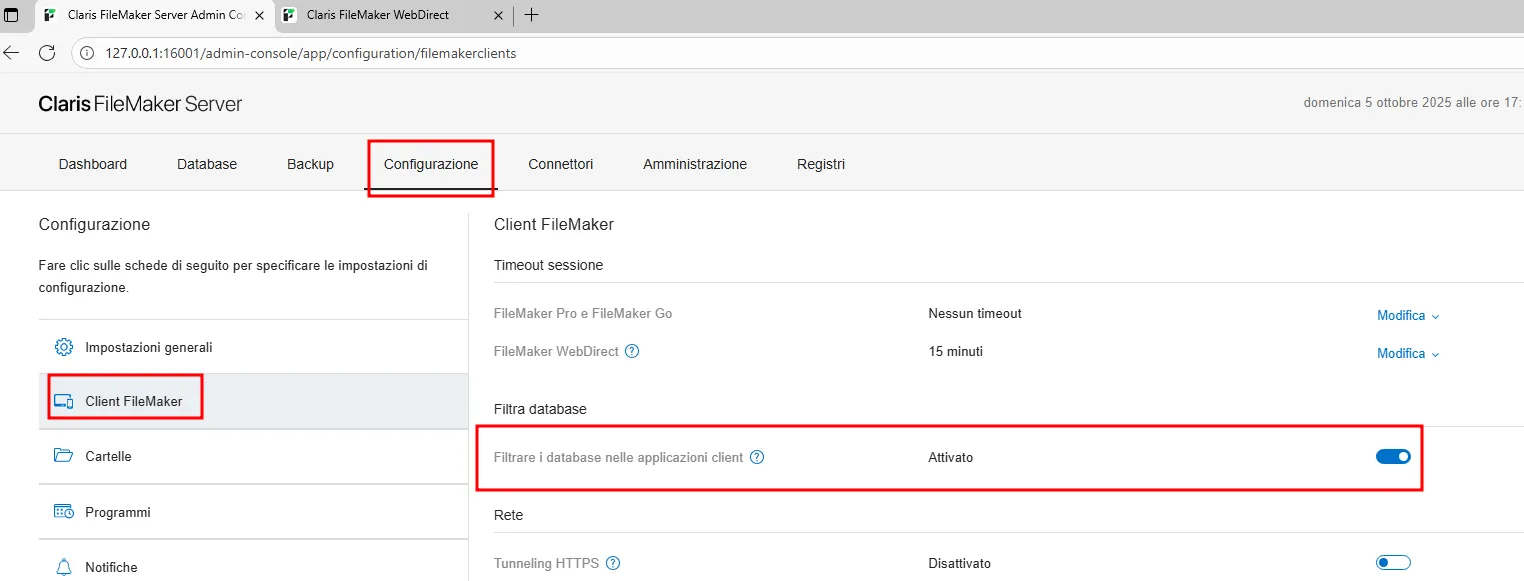
This prevents unauthenticated users from viewing the names of the existing databases. However, if the databases are accessible to guest users, this measure does not restrict their access.
Reference:
https://help.claris.com/en/server-help/content/config-client-filter-databases.html
Reducing Information Disclosure in FileMaker WebDirect
When FileMaker Server is installed on Windows using Microsoft Internet Information Services (IIS) for WebDirect, some default configurations may unintentionally expose sensitive information.
Although this setup is quite typical, it also makes part of your infrastructure accessible from the internet, increasing the potential attack surface. And while the same concern applies to other environments (just with different web technologies), the principle remains the same: every public-facing service increases your attack surface.
The global internet is continuously scanned by automated tools and bots, both legitimate, such as search engines or research crawlers, and potentially malicious, in search of systems that expose sensitive information or weak configurations. When a server unintentionally reveals technical details about its setup (for example, that it’s running IIS or FileMaker WebDirect), it provides valuable hints about the underlying environment.
Elements like default pages, test endpoints, or HTTP headers that disclose server details may seem harmless, but they make reconnaissance significantly easier. Even small pieces of information can be correlated with known vulnerabilities or used to guide more targeted probing activity.
Once FileMaker WebDirect is deployed, a number of endpoints are exposed by default, revealing information about the underlying technologies. While Claris does not officially acknowledge or document this misconfiguration, I identified specific endpoints that disclose such details, most notably the following:
- https://[server_address]:443/fmi/webd/[not_existing_db]
- https://[server_address]:443/fmi/webd/[existing_db]/
- https://[server_address]:443/fmi/[not_existing_ep]
- https://[server_address]:443/webd/
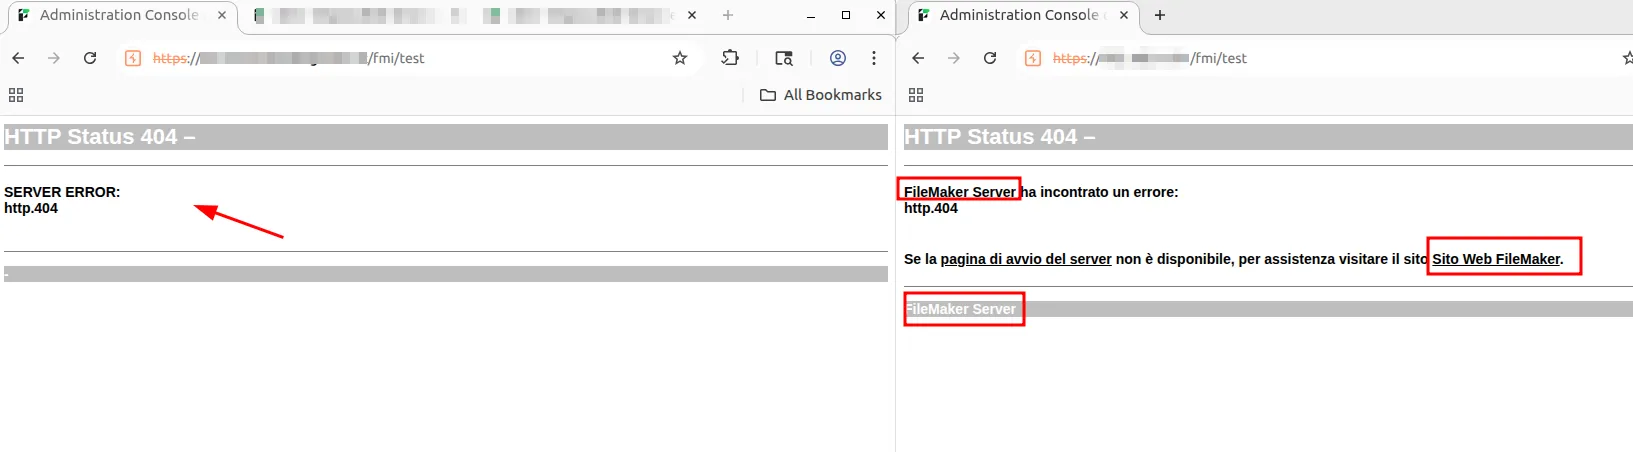
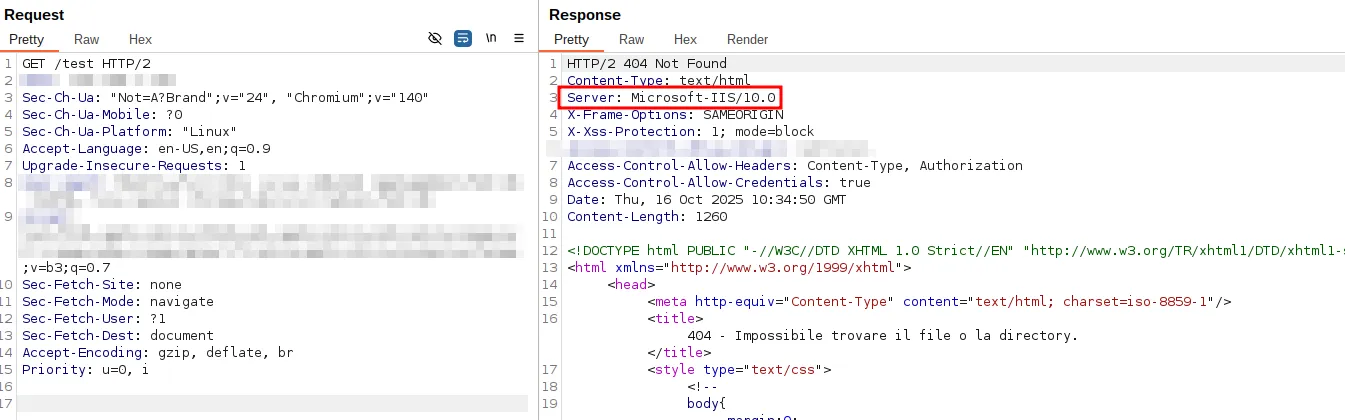
Below is an example of what information may be collected, such as the use of FileMaker Server and the version of IIS in use, and how these pages should appear in a correct configuration.
On the right is the page displaying FileMaker usage details, while on the left is the same page after that information has been removed.
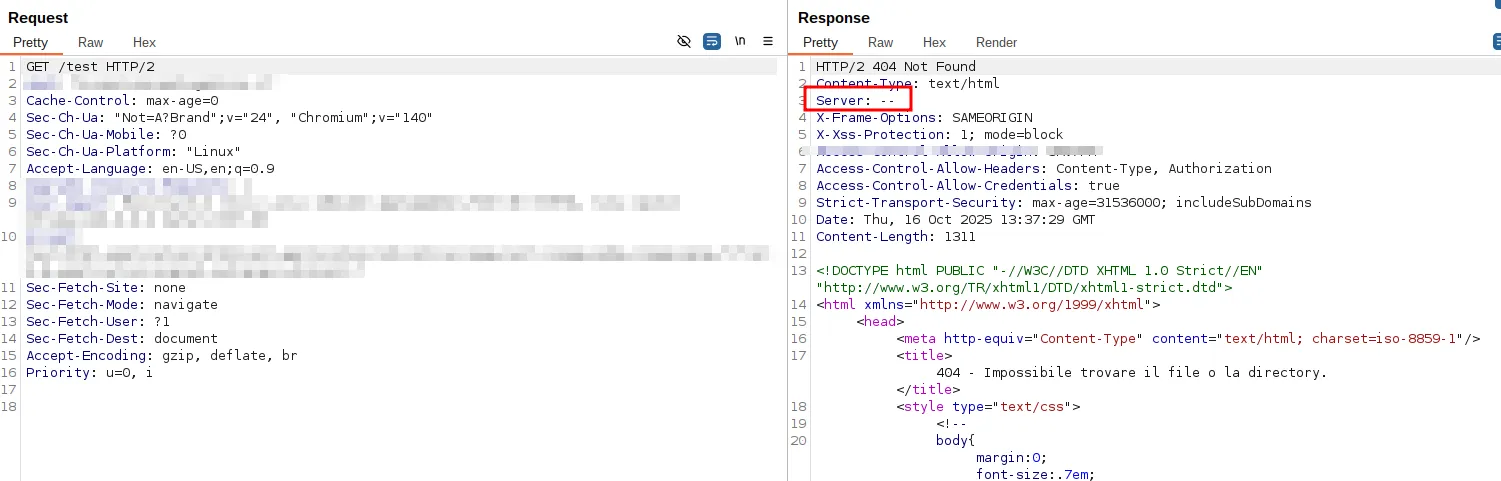
Instead, the next example shows the request used to obtain the IIS version, and how it appears after the fixes were implemented.
To mitigate this, there are several approaches a system administrator can use; one possible method is to add specific outboundRules to the web.config file located in C:\Program Files\FileMaker\FileMaker Server\HTTPServer\conf\.
These rules instruct IIS to filter the inspected traffic and remove information that could reveal the technologies in use.
<rule name="Custom Rule 1" preCondition="IsHtmlResponse">
<match filterByTags="None" pattern="FileMaker Server ha incontrato un errore" />
<action type="Rewrite" value="SERVER ERROR" />
</rule>
<preConditions>
<preCondition name="IsHtmlResponse">
<add input="{RESPONSE_CONTENT_TYPE}" pattern="^text/html" />
</preCondition>
</preConditions>
<rule name="Custom Rule 2" preCondition="IsHtmlResponse">
<match filterByTags="None" pattern="FileMaker Server" />
<action type="Rewrite" value="-" />
</rule>
<rule name="Remove Server Header" enabled="true">
<match serverVariable="RESPONSE_SERVER" pattern=".+" />
<action type="Rewrite" value="--" />
</rule>
<rule name="Custom Rule 3" preCondition="IsHtmlResponse">
<match filterByTags="None" pattern="<h4>Se la .*?Sito Web FileMaker.*?</h4>" />
<action type="Rewrite" value="" />
</rule>
After restarting the web server, the changes should take effect successfully.
These are just a few examples of this issue; as a general rule, the less information you expose, the better, as long as there’s no impact on the user experience and all functionalities remain intact.
In addition to removing unnecessary information, FileMaker WebDirect also exposes a few default pages that, in my opinion, can, and should, be removed for the same security reasons mentioned above, such as the following:
- https://[server_address]:443/index.html
- https://[server_address]:443/fmwebd_home.html
- https://[server_address]:443/fmwebd_home.js
Reference:
https://help.claris.com/en/security-guide/content/replace-default-web-server-page.html
Fix IIS misconfiguration
As mentioned in the previous chapter, in many environments FileMaker Server uses Microsoft IIS to publish databases via the WebDirect component. While this configuration is officially supported and widely adopted, IIS is often deployed with default settings that are not fully hardened from a security standpoint. These defaults are designed to maintain backward compatibility and ease of deployment, but in practice they can expose unnecessary information about the underlying system and web applications.
One example of this is the IIS Short Name Enumeration issue, caused by the legacy 8.3 filename compatibility in Windows; a feature that remains enabled by default after a standard FileMaker Server installation.
This feature allows IIS to respond differently depending on whether a requested short-form filename (for example INDEX~1.HTM) actually exists on the server. As a result, it is possible to infer the presence of files and directories, even when directory listing is disabled, potentially revealing details about the structure of the FileMaker WebDirect environment or other hosted components.
The following example demonstrates how, by using a public tool, it is possible to enumerate several existing files within the FileMaker Server root directory, including potentially sensitive configuration files.
$ shortscan https://[REDACTED]/
Shortscan v0.9.2
═══════════════════════════════════════════════════════════════════════
═════════
URL: https://[REDACTED]/
Running: Microsoft-IIS/10.0
Vulnerable: Yes!
═══════════════════════════════════════════════════════════════════════
═════════
INDEX~1.HTM   INDEX.HTM?   ->   INDEX.HTML
FMWEBD~1.JS   FMWEBD?.JS
LOGOUT~1.HTM  LOGOUT?.HTM? ->   LOGOUT.HTML
FMWEBD~1.HTM  FMWEBD?.HTM?
PHPINF~1.PHP  PHPINF?.PHP?
WEB~1.CON     WEB.CON?
═══════════════════════════════════════════════════════════════════════
═════════
Finished! Requests: 813; Retries: 0; Sent 167066 bytes; Received 533726
bytes
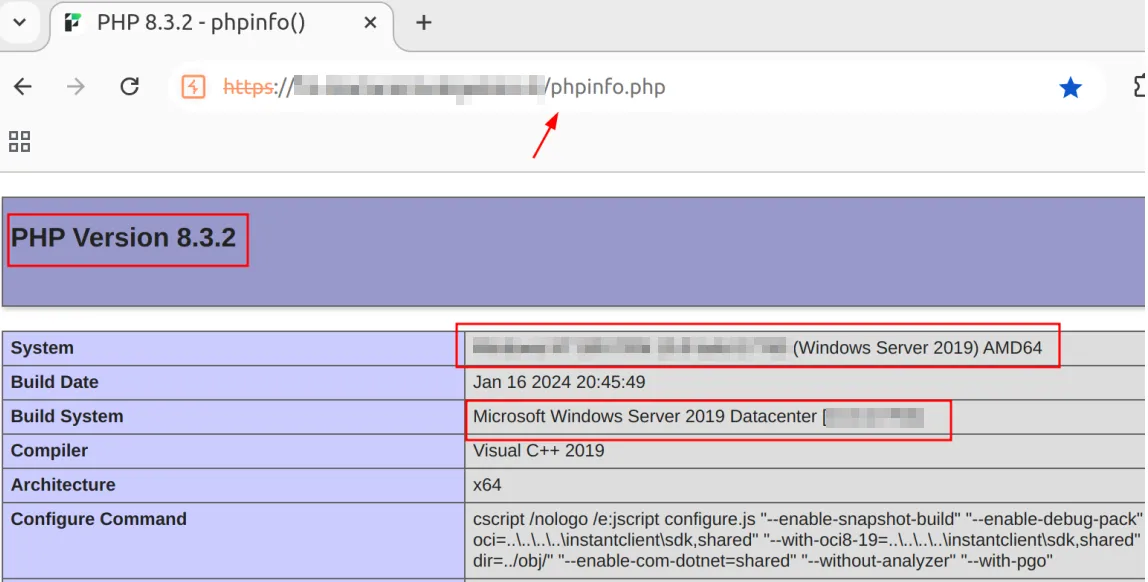
For instance, the file identified by the shortname PHPINF~1.PHP likely corresponds to the PHP diagnostic file phpinfo.php, as confirmed by the screenshot below.
The
WEB~1.CON file refers to the default web.config file that FileMaker generates automatically during installation.

To mitigate this risk, you should review and harden the IIS configuration used by FileMaker Server by following the steps below:
- Open the Registry Editor.
- Go to:
HKEY_LOCAL_MACHINE\SYSTEM\CurrentControlSet\Control\FileSystem - Right-click
NtfsDisable8dot3NameCreationand choose Modify. - Set the Value data to
1, then click OK to save.
Finally, recreate the web root folder to remove any files that still use the old 8.3 naming format, and restart your web server.
That’s it, the change will disable the legacy short filename convention and prevent similar issues from occurring in the future.
Reference:
https://community.claris.com/en/s/article/Mitigating-the-IIS-Shortname-Vulnerability-in-FileMaker-Server
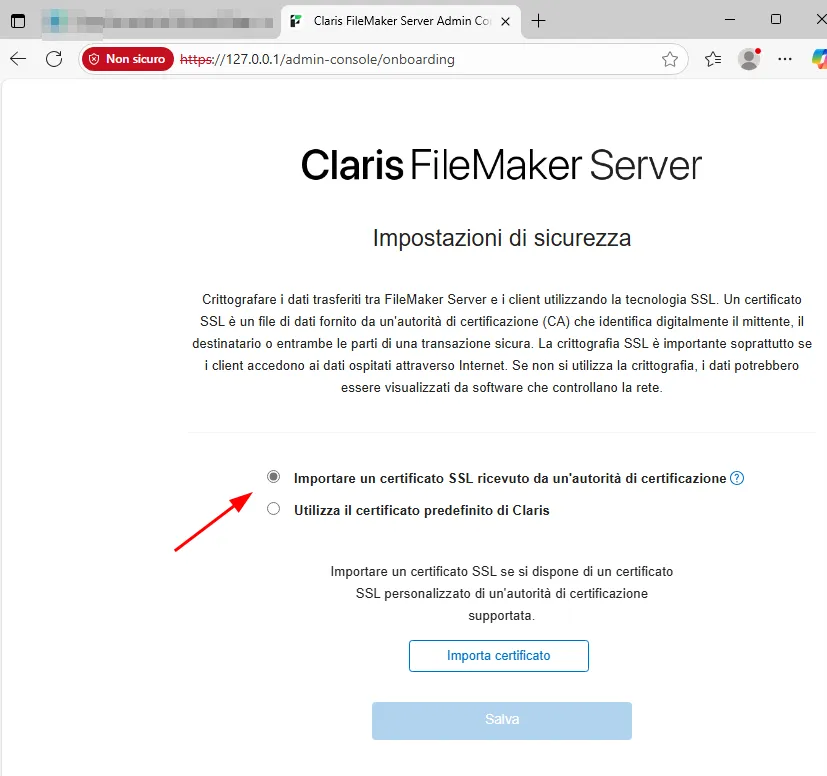
Install a valid TLS Certificate
By default, FileMaker Server allows the deployment of a self-signed TLS certificate (although Claris strongly discourages their use). While this enables encrypted communication, it introduces several security and operational risks.
From a management standpoint, self-signed certificates lack centralized lifecycle control, making revocation in the event of key compromise complex and unsustainable in large-scale environments. Furthermore, they inherently increase exposure to man-in-the-middle (MITM) attacks. From a user perspective, they trigger browser and client trust warnings, and may lead to connection failures in systems enforcing strict TLS validation policies.
To prevent this, Always install a valid TLS certificate issued by a trusted Certificate Authority (CA). A valid certificate ensures that connections to the Admin Console, and WebDirect service are both encrypted and authenticated.
You can obtain certificates from commercial CAs or generate free ones through Let’s Encrypt, which FileMaker supports as of recent versions.
Reference:
https://help.claris.com/en/server-installation-configuration-guide/content/requesting-ssl-certificate.html
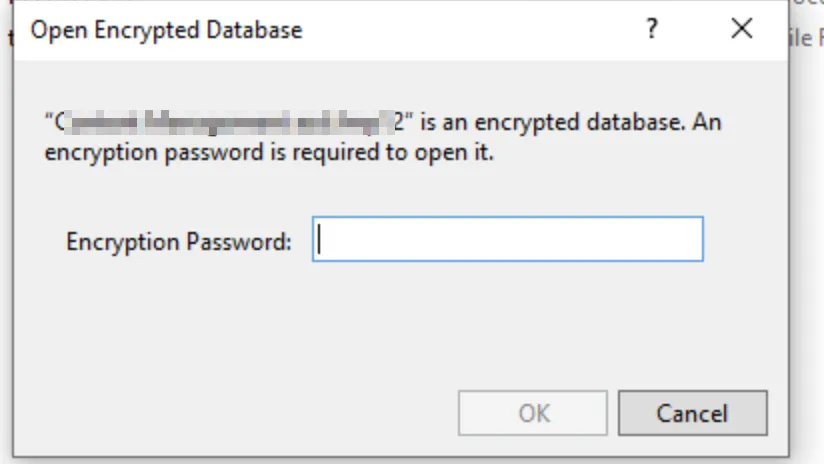
Encrypt Databases at Rest
Even in a secure network environment, unencrypted database files remain exposed to risks such as physical server theft, unauthorized disk access, or compromised backups.
FileMaker supports Encryption at Rest, which protects database files with a password that must be entered before they can be opened.
To enable Encryption at Rest in FileMaker, the following steps are required:
- Open FileMaker Pro and go to
Edit -> Preferences -> enable Use advanced tools. - A new Tools menu will appear. Go to
Tools -> Developer Utilities. - Add the file you want to encrypt and specify a project folder where the encrypted file will be saved.
- Click
Solution Options, choose an existing account, and set a password to encrypt the file. - Click Apply, and that’s it!
From now on, every time you open the file, you’ll need to decrypt it using the password you set.
Make sure your encryption password follows a strong password policy, and never reuse the same password across different environments.
Reference:
https://help.claris.com/en/pro-help/content/encrypting-database-files.html
Conclusion
Keeping FileMaker Server safe isn’t complicated, but it does need some care. The default setup is designed to work right away, not to be fully locked down. With a few changes and regular checks, you can turn a simple install into a secure and reliable system.